Who this guide is for
This guide takes you from a fresh download to running your whole installment business in the software — customers, plans, payments, receipts, recovery, reports, and backups. It's written for shop owners and counter staff, not IT people. Every step is something you'll do at the counter, and every screen mentioned has its own "How to Use" drawer button inside the app if you need a reminder later.
Throughout the guide we'll follow one running example: a mobile shop selling a phone for Rs 219,000 — Rs 39,000 down and 6 monthly installments of Rs 30,000. The same steps work identically for a furniture store in Texas selling a $1,800 sofa or an EMI dealer in Delhi selling a ₹24,000 phone; only the currency changes, and the software sets that automatically from your country.
---
Step 0 — How do I install it? (about 1 minute)
- Download
Timeline-Free-Installment-Manager-Setup-1.6.0.exefrom the download page. It's about 90 MB. - Double-click the file. If Windows asks for permission, click Yes.
- Click I Agree → Install. Installation takes under a minute.
- The app opens automatically when it finishes, and you'll find shortcuts on your Desktop and in the Start Menu.
Requirements: Windows 10 or 11, 64-bit. That's it. There is no account to create, no email to enter, and no internet needed — not for installation, not ever. Everything you're about to enter is stored in a local database on this PC only.
Step 1 — How do I set up my business?
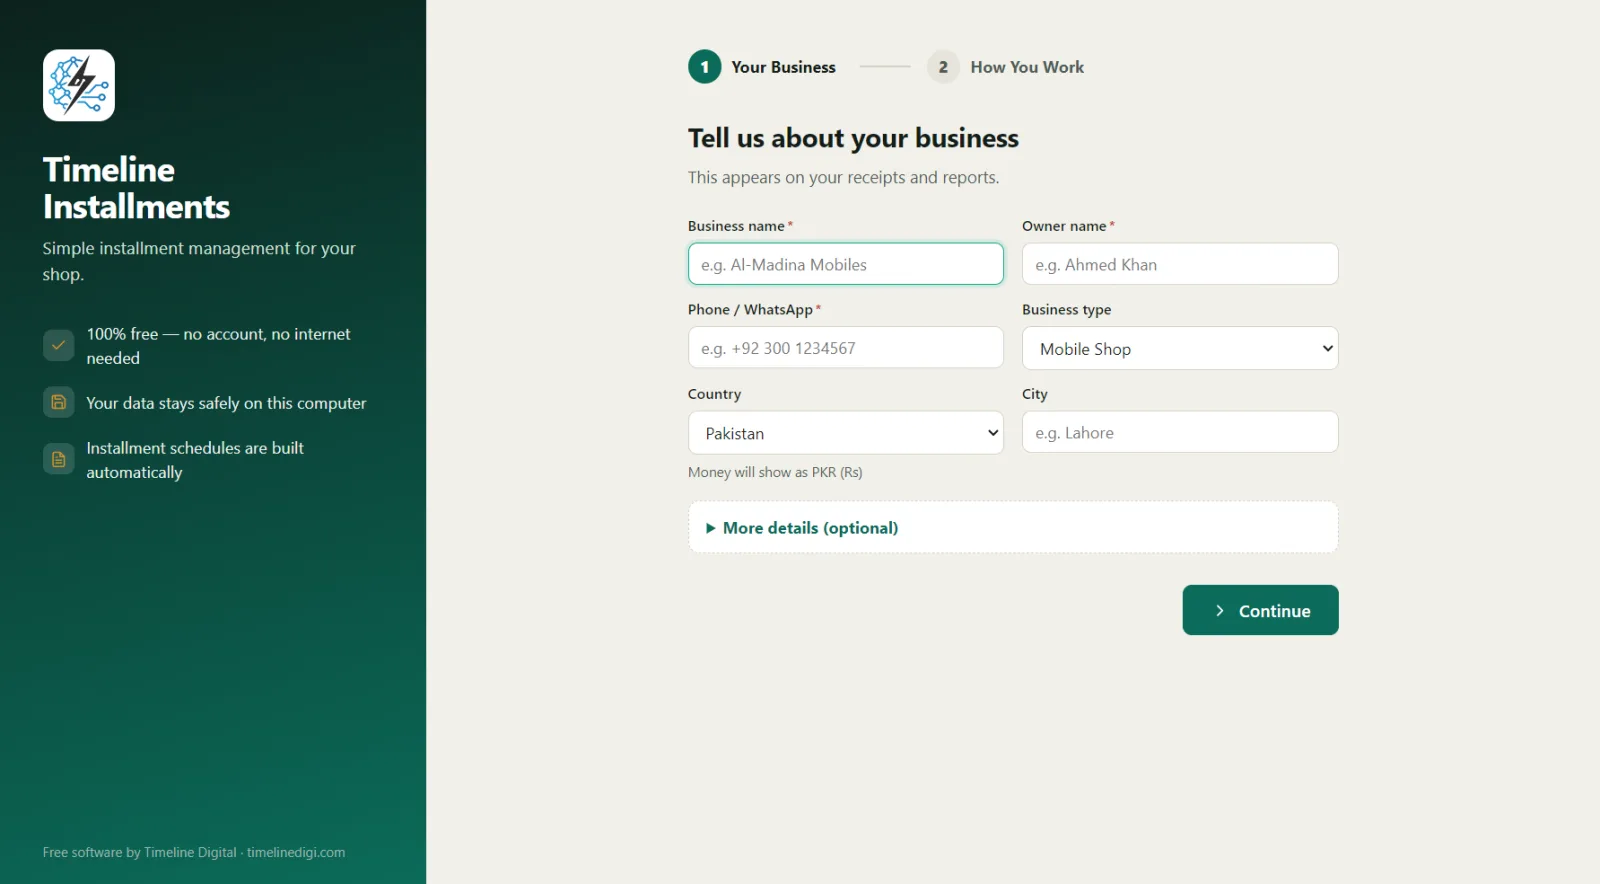
Setup is a 2-step wizard:
- Business details — your shop name, owner name, and phone.
- Working preferences — how you like to work day to day.
Pick your country and the currency is chosen automatically from 150+ countries — Pakistan gets Rs, India gets ₹, the USA gets $, the UK gets £, Bangladesh gets ৳, the UAE gets د.إ. Don't stress over any answer: everything here can be changed later in Settings, and changing the country there instantly updates the currency and date format across the whole app — every screen, receipt, and report.
Click Continue → Start Using the App, and you're in.
Tip before adding real data: go to Settings → Sample Data and click Load. The app fills every module with realistic demo customers, plans, and payments. Click around, receive a fake payment, print a fake receipt, break nothing. When you're comfortable, click Remove — it deletes only what it added, never your real records.
Step 2 — How is the app laid out?
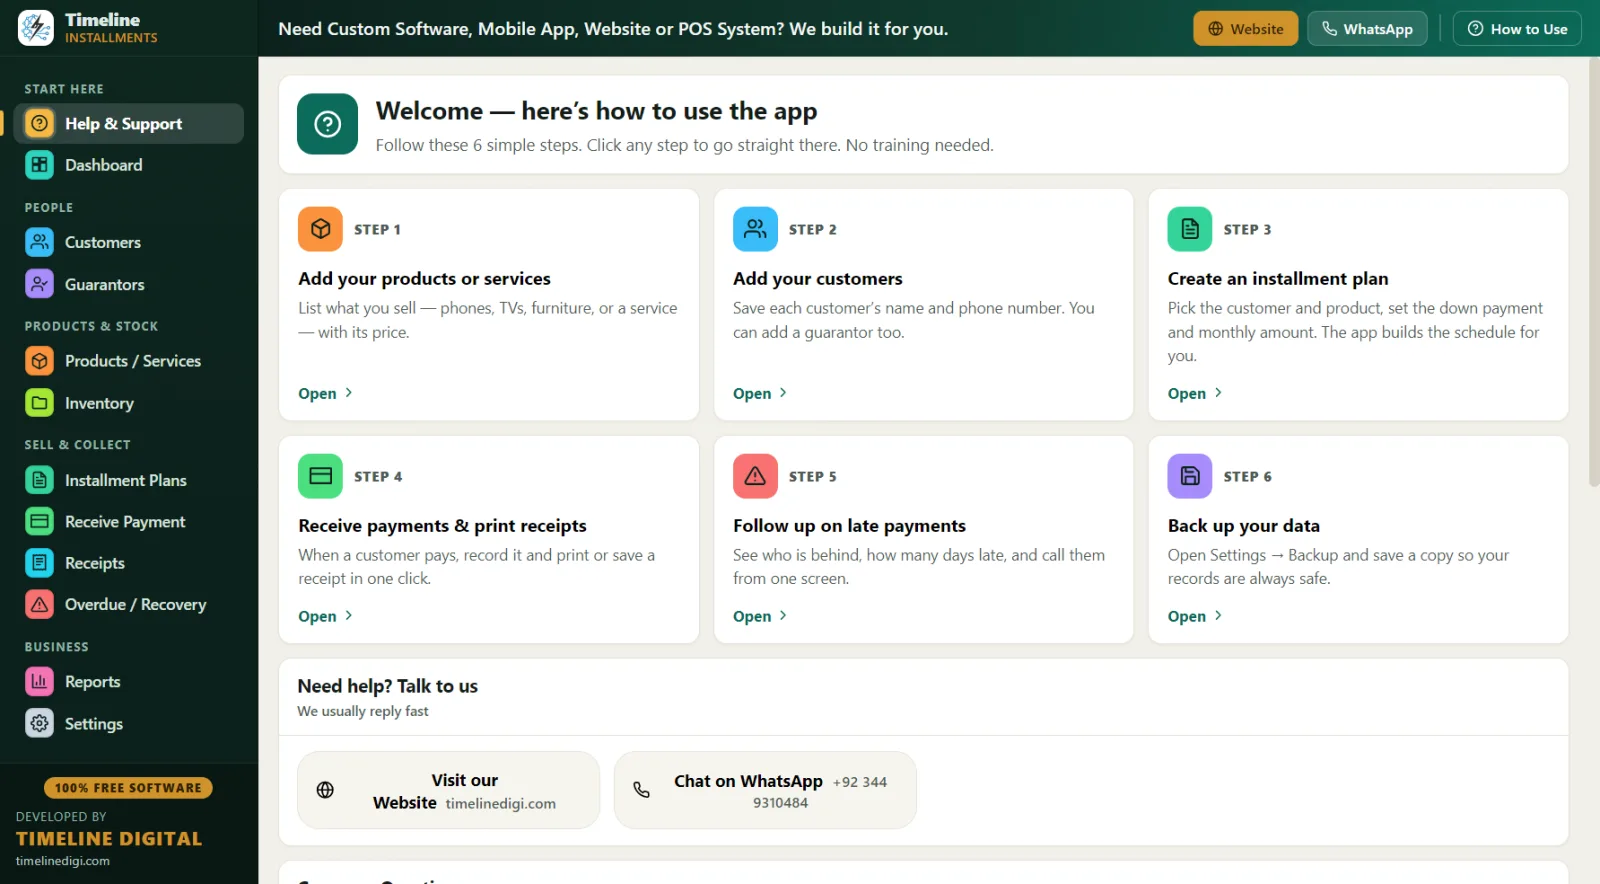
The sidebar is arranged in workflow order — the order your business actually runs:
| Section | What lives there |
|---|---|
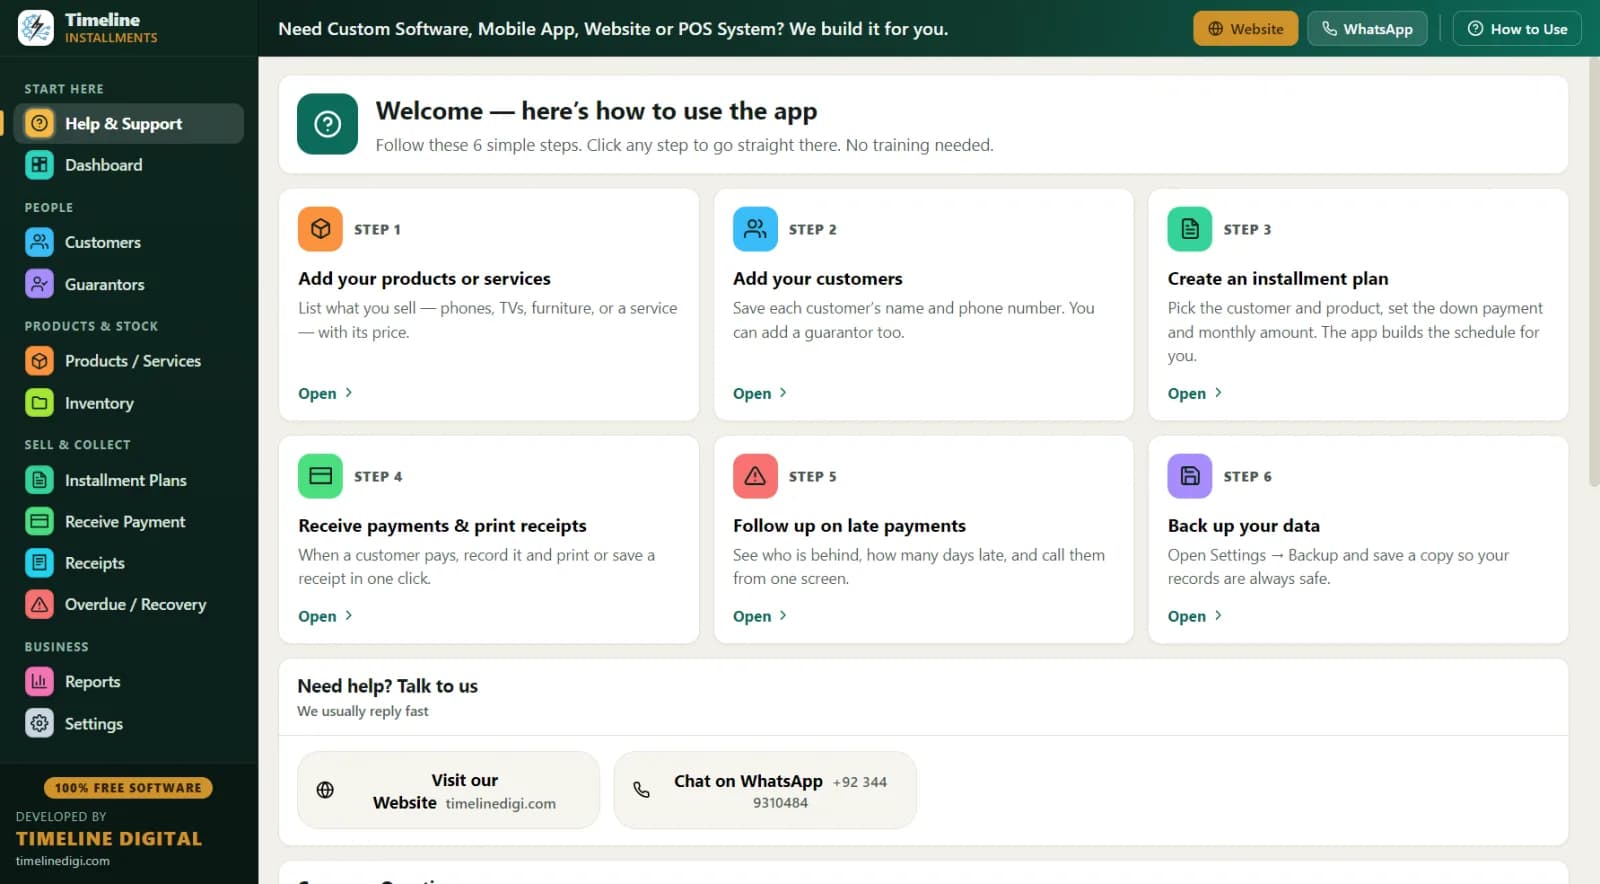
| Help & Support (top) | 6-step visual quick-start, FAQs, contact details |
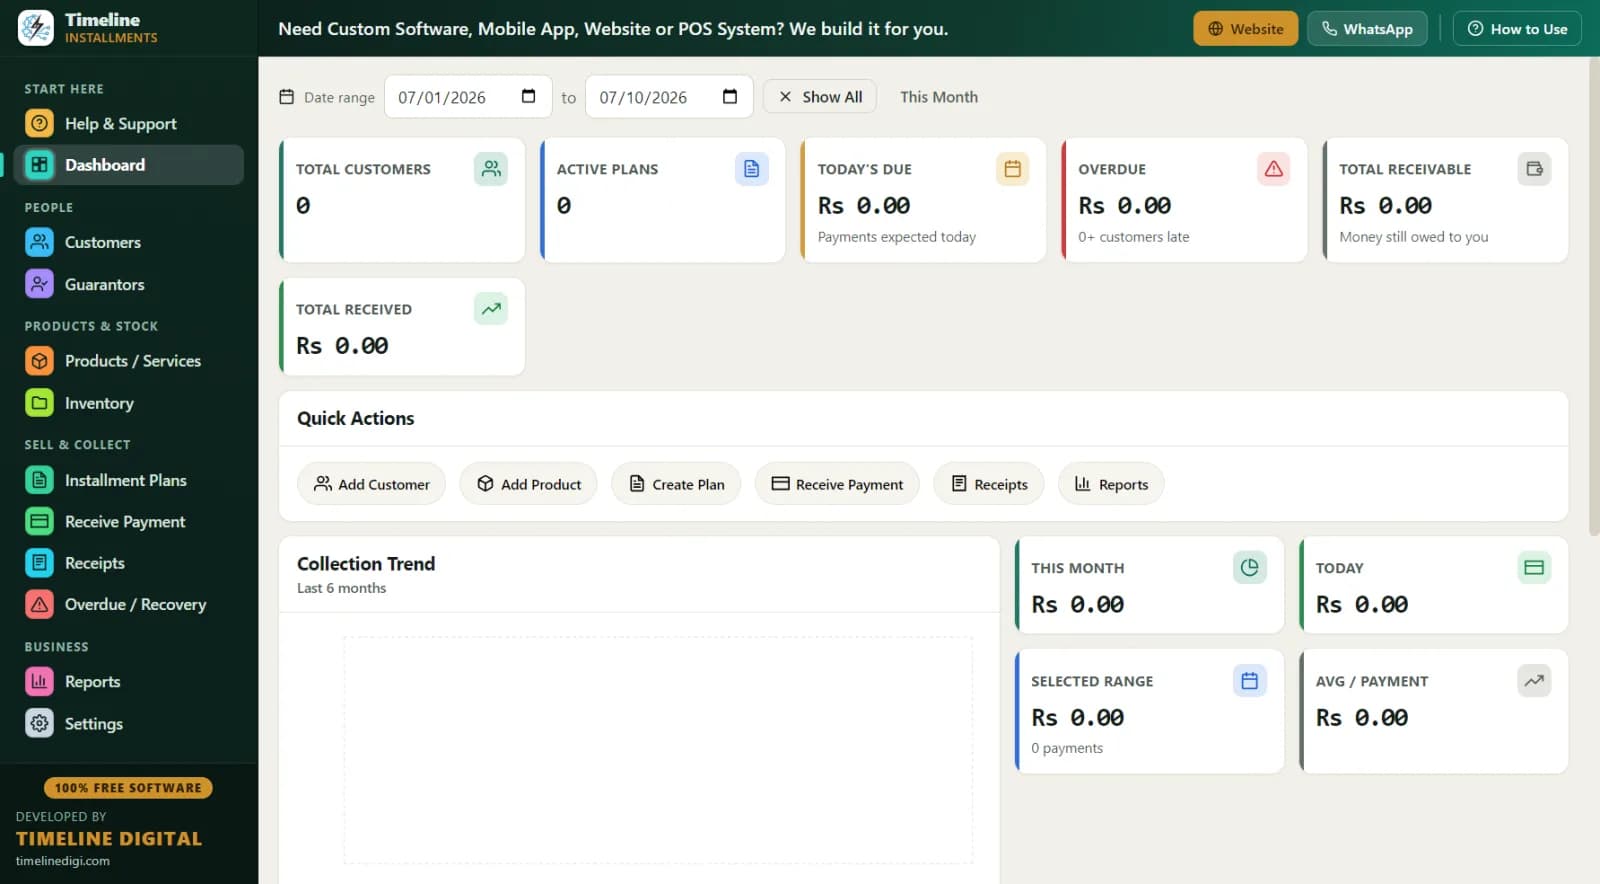
| Dashboard | Today's numbers and the 6-month collection trend |
| Customers, Guarantors | The people |
| Products/Services, Inventory | What you sell and your stock |
| Installment Plans, Receive Payment, Receipts | Selling and collecting |
| Overdue/Recovery, Reports | Chasing money and understanding your business |
| Settings | Your profile, currency, receipts, backups |
Two help layers exist so nobody gets lost: the Help & Support page with clickable quick-start cards, and a "How to Use" drawer button on every page with steps written for that exact page. Staff stuck on Receive Payment can read how to receive a payment without leaving the screen.
Step 3 — How do I add my products?
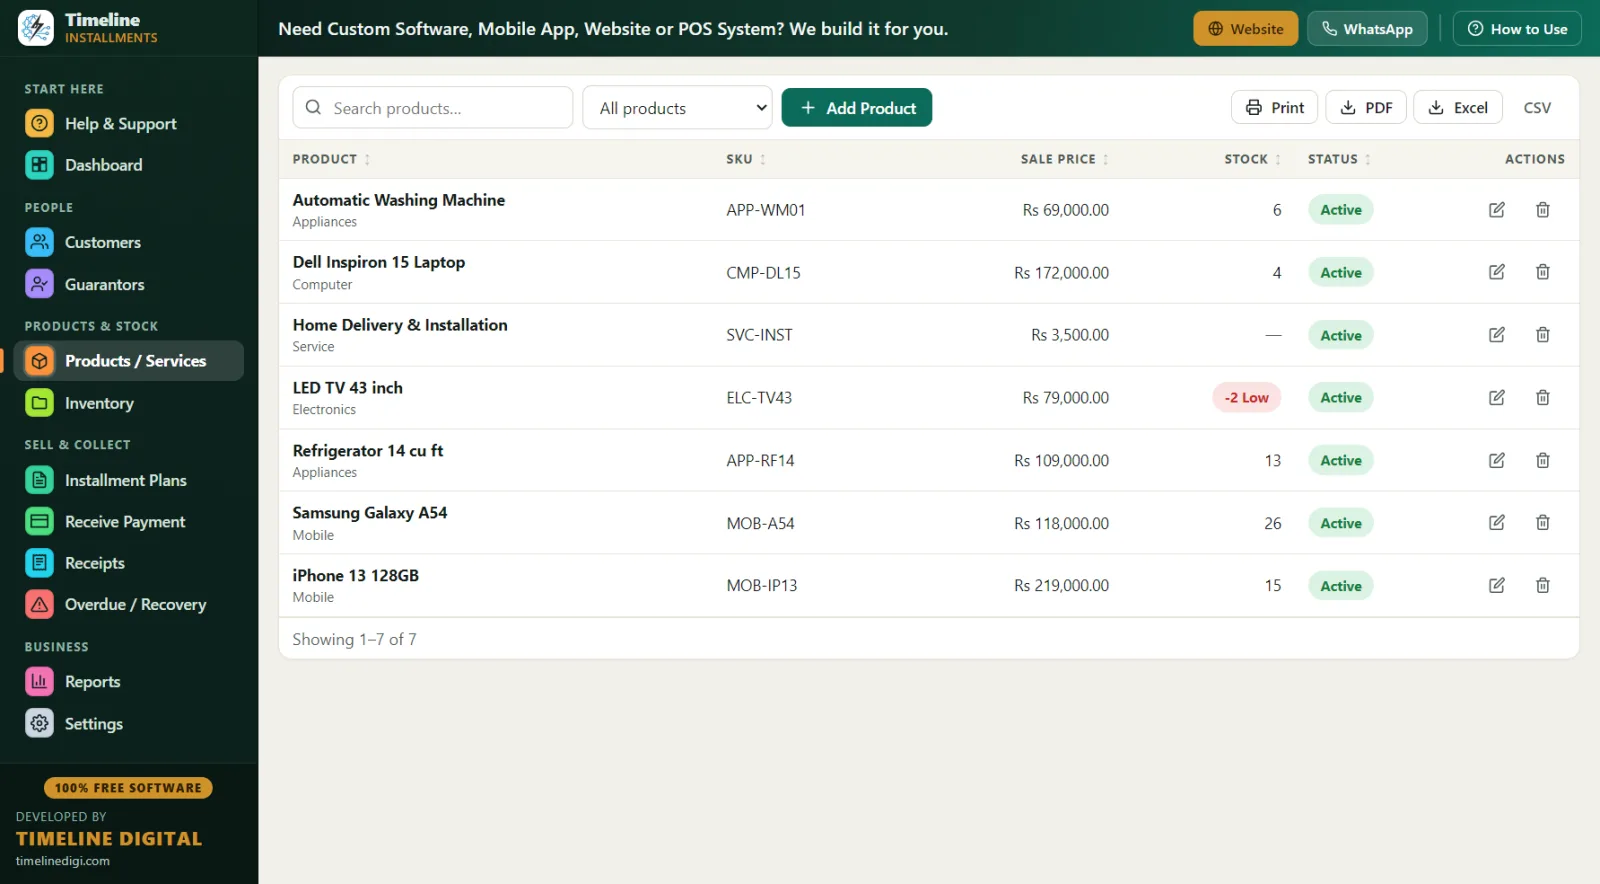
Go to Products / Services → Add Product. Only the essentials are required; the rest is optional but useful:
- Category (e.g., Mobiles, Furniture) — this powers the Category Wise report later.
- SKU if you use item codes.
- Purchase price and sale price — enter both and you'll always know your margin.
- Stock quantity with a low-stock alert, so you notice before a fast-mover runs out.
- Warranty text (e.g., "1 year official warranty") — it can appear with the item on plans.
- Type: product or service. Repairs, tuition, or subscriptions? Mark them as a service and stock is skipped entirely.
Here's the part that saves real headaches: when a tracked product is sold on an installment plan, its stock automatically drops by 1, and the Inventory page records a movement note like "Sold on plan INV-1." Your stock count and your installment book can never quietly disagree.
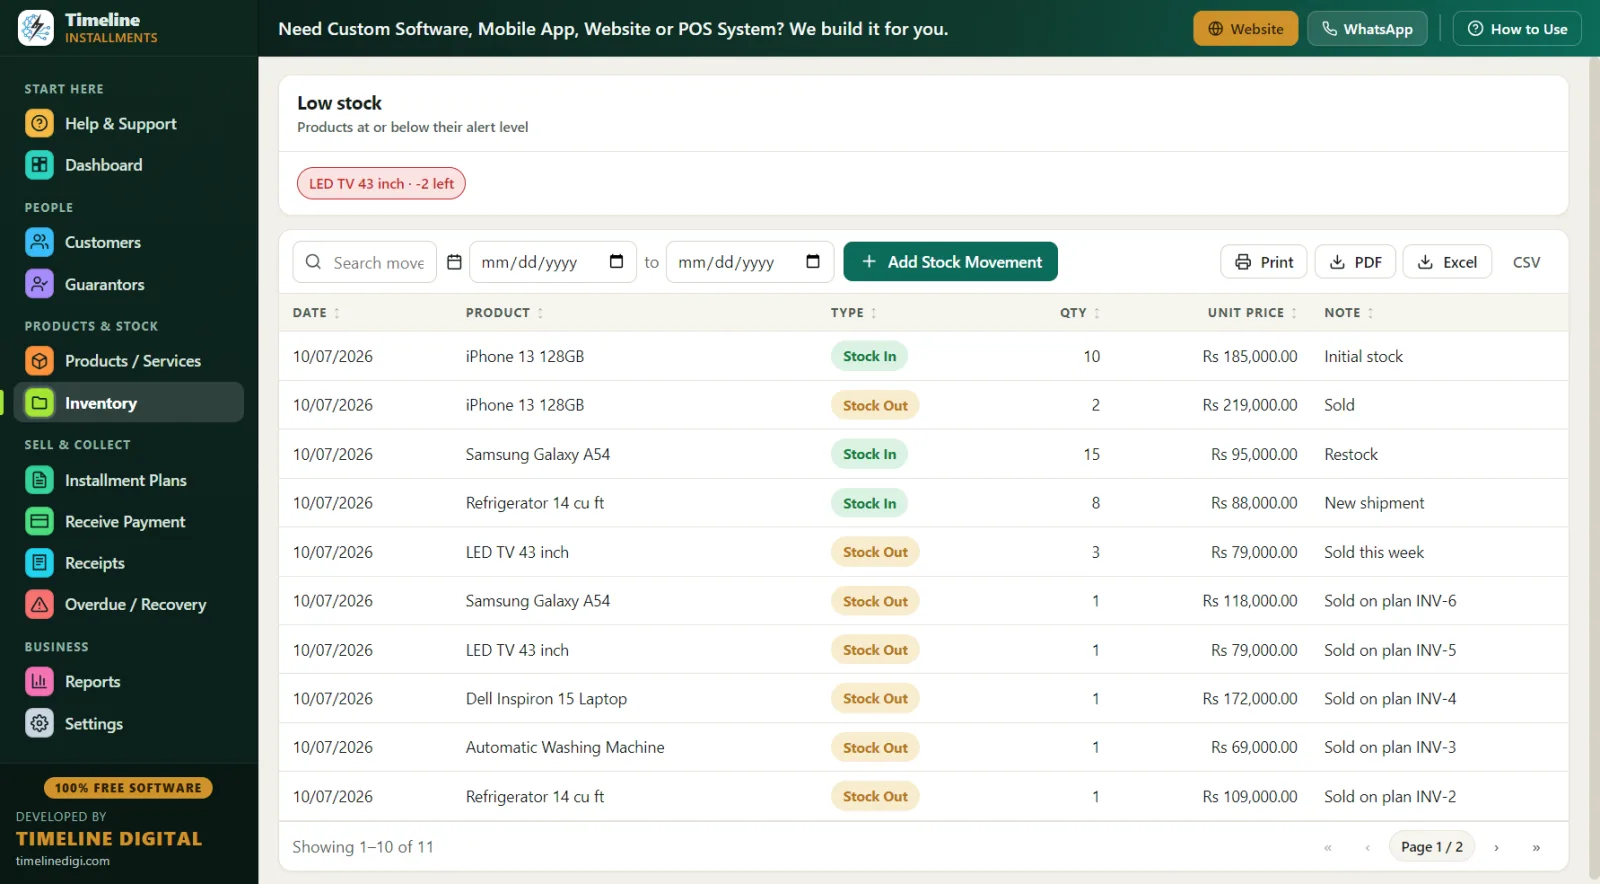
Use the Inventory page for everything else: stock arriving from a supplier (stock in), a damaged unit written off (stock out), each with a note explaining why.
Step 4 — How do I add customers and guarantors?
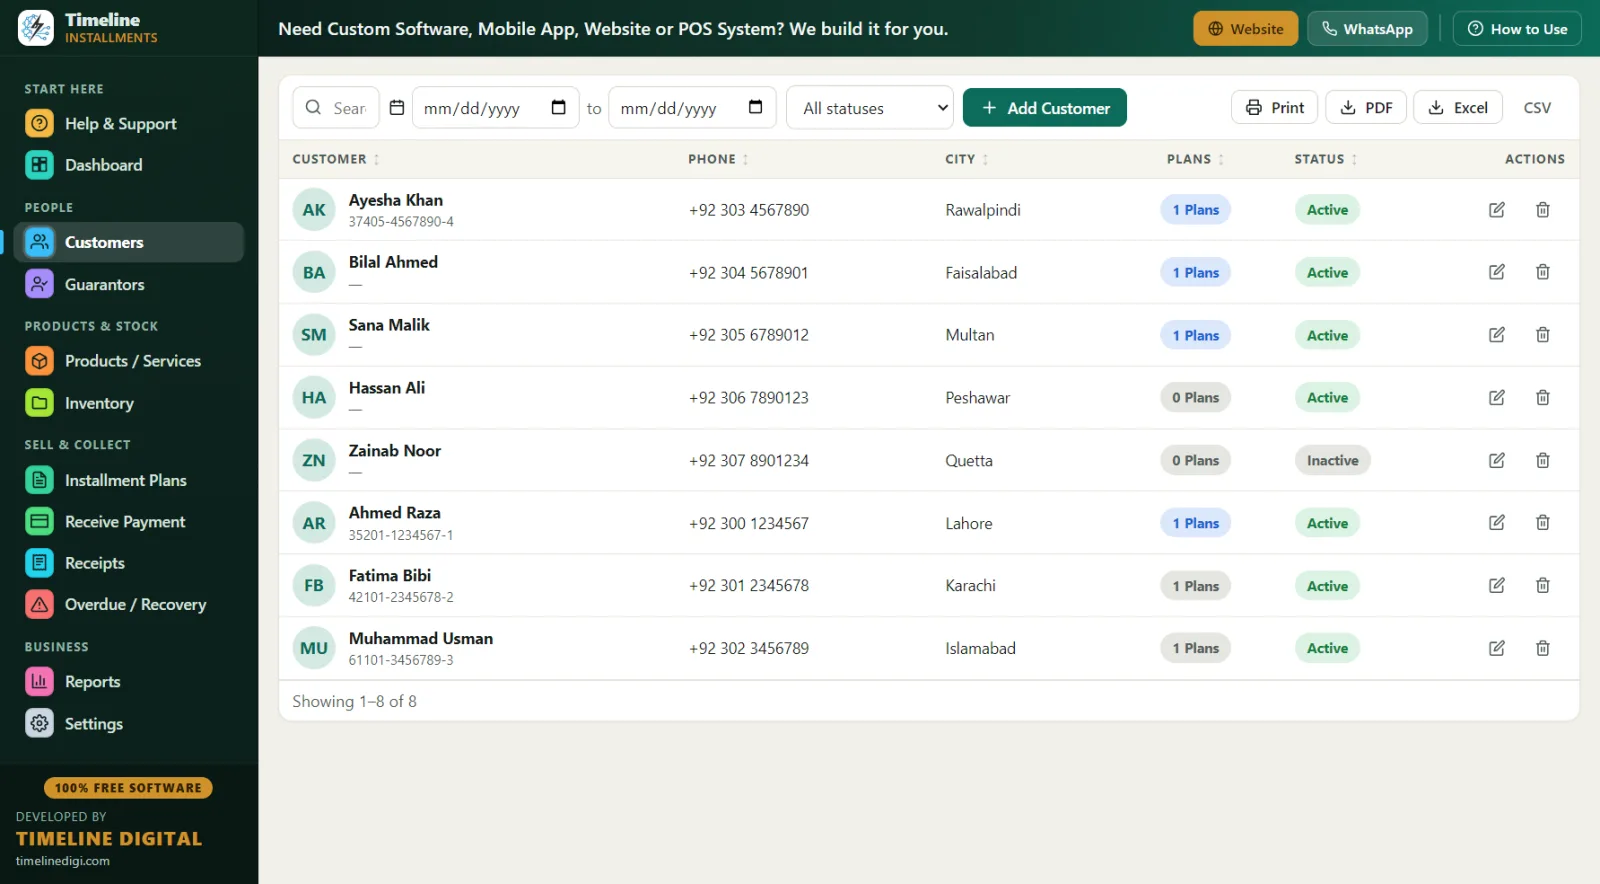
Go to Customers → Add Customer. Only name and phone are required — a new customer takes ten seconds even with a queue at the counter. When you have a moment, the optional fields earn their keep:
- WhatsApp, email, city, country — city feeds the Area Wise report and recovery routes.
- ID type and number — CNIC (Pakistan), Passport, or National ID. For installment sales, always record ID; it's your protection if recovery ever gets serious.
- Address and notes — "works at the tailor market, brother of Aslam" is the kind of note that finds a late payer.
- Status — keep the list tidy as customers come and go.
Click any customer's row to open their full history: every plan, every payment, linked guarantors, and totals. When a customer says "I already paid last month," this page settles it in five seconds.
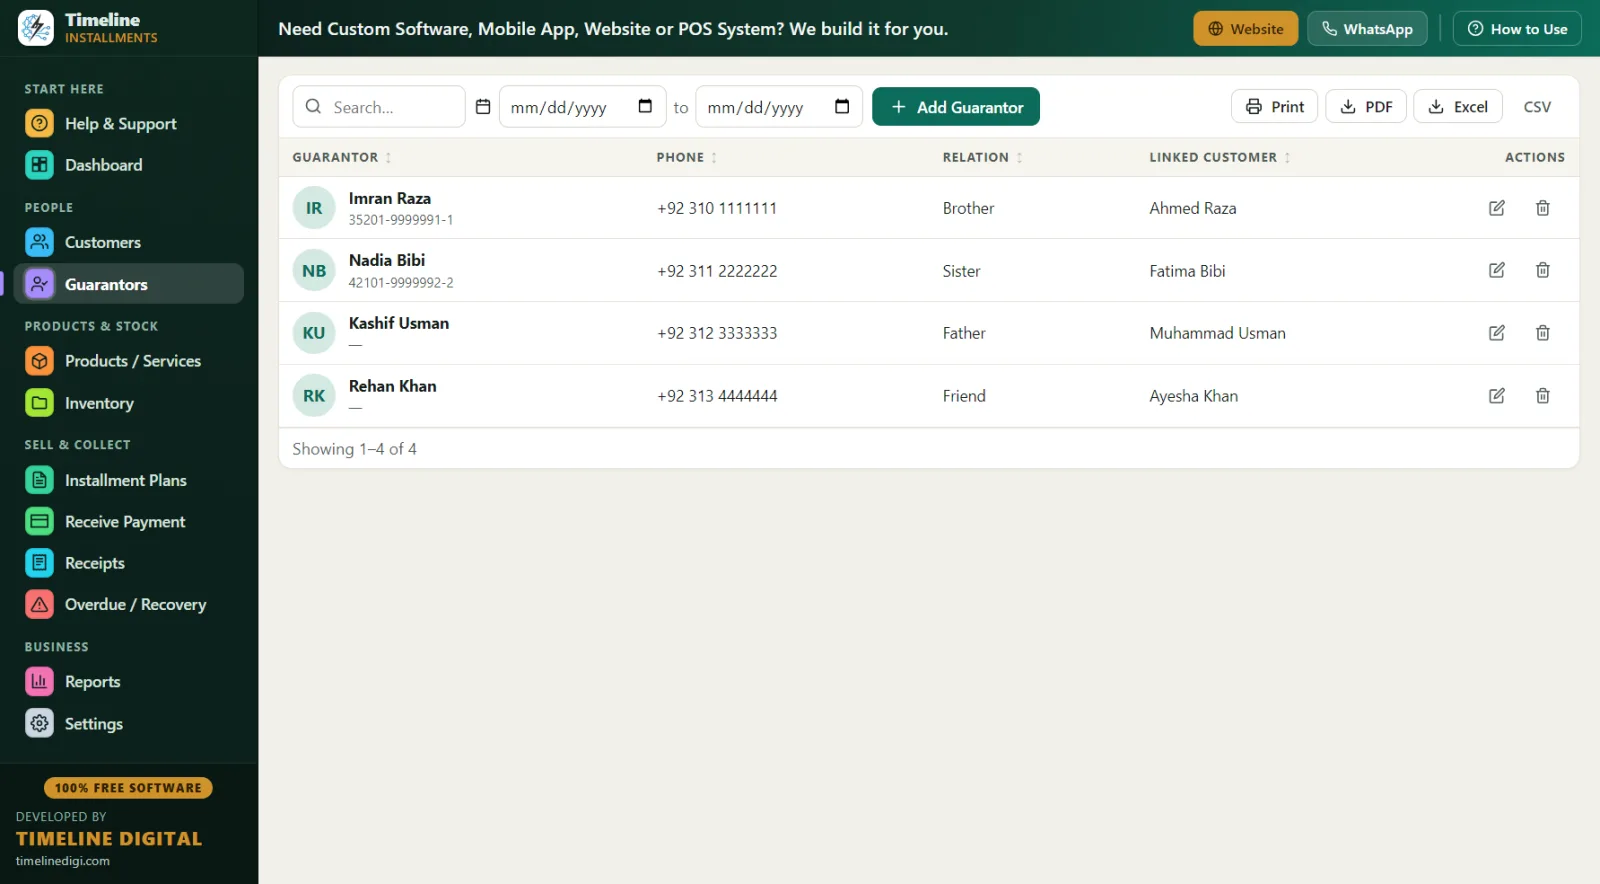
On Guarantors, record the guarantor's name, phone, relation, and ID, linked to a specific customer and plan. Why bother? Because on the Overdue screen, the guarantor's name and phone sit right next to the late customer's. When calls to the buyer go unanswered, the next call is one glance away.
Step 5 — How do I create an installment plan?
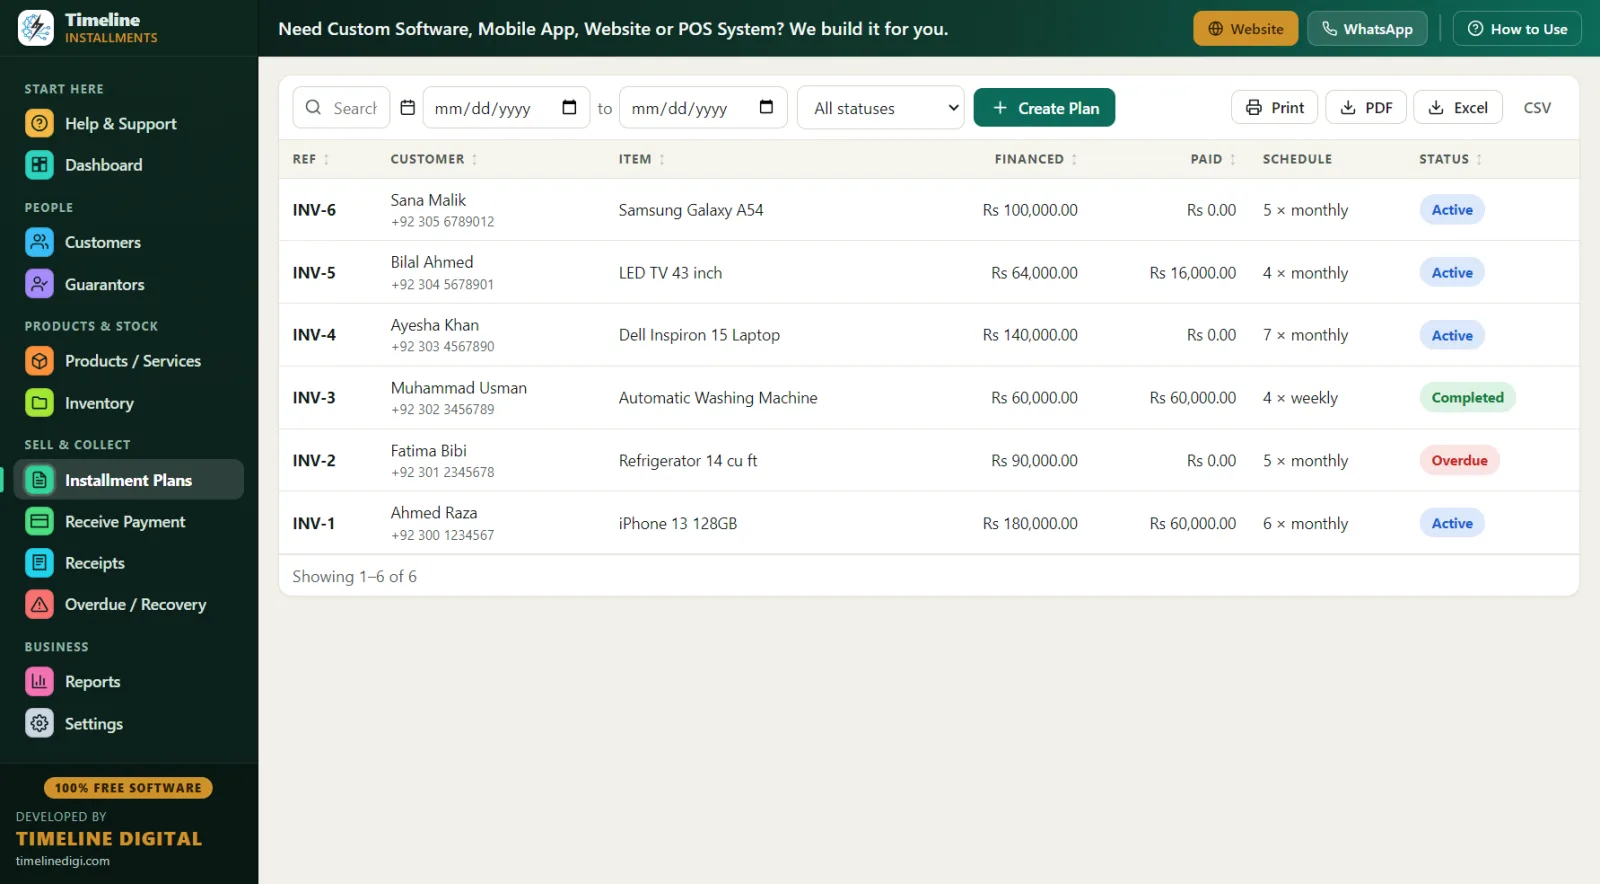
This is the heart of the app. Go to Installment Plans → Create Plan. Using our example — Rs 219,000 phone, Rs 39,000 down, 6 monthly installments:
- Pick the customer — start typing a name and the type-to-search select finds them. New walk-in? Click the New Customer button inside the form, enter name + phone, done — the customer and the plan are created together in one save. Nobody waits while you switch screens.
- Pick the guarantor (optional) and the product, both type-to-search.
- Enter total amount: 219,000, down payment: 39,000, installments: 6, frequency: monthly, and the start date.
- Optional: a late fee — either a fixed amount (e.g., Rs 500 per late installment) or a percentage of the remaining balance. Add notes if needed.
- Watch the live schedule preview appear instantly: 6 rows, Rs 30,000 each, with exact due dates. If the numbers didn't divide evenly, the last installment absorbs the rounding — Rs 100,000 over 3 installments becomes 33,333 + 33,333 + 33,334, never a rupee off.
- Click Create Plan.
Three things happen automatically:
- The down payment is recorded as the first payment, with its own printable receipt.
- The plan gets a reference like INV-1 (change the prefix in Settings if you prefer something like "TL-").
- If the product is stock-tracked, stock drops by 1 with the note "Sold on plan INV-1."
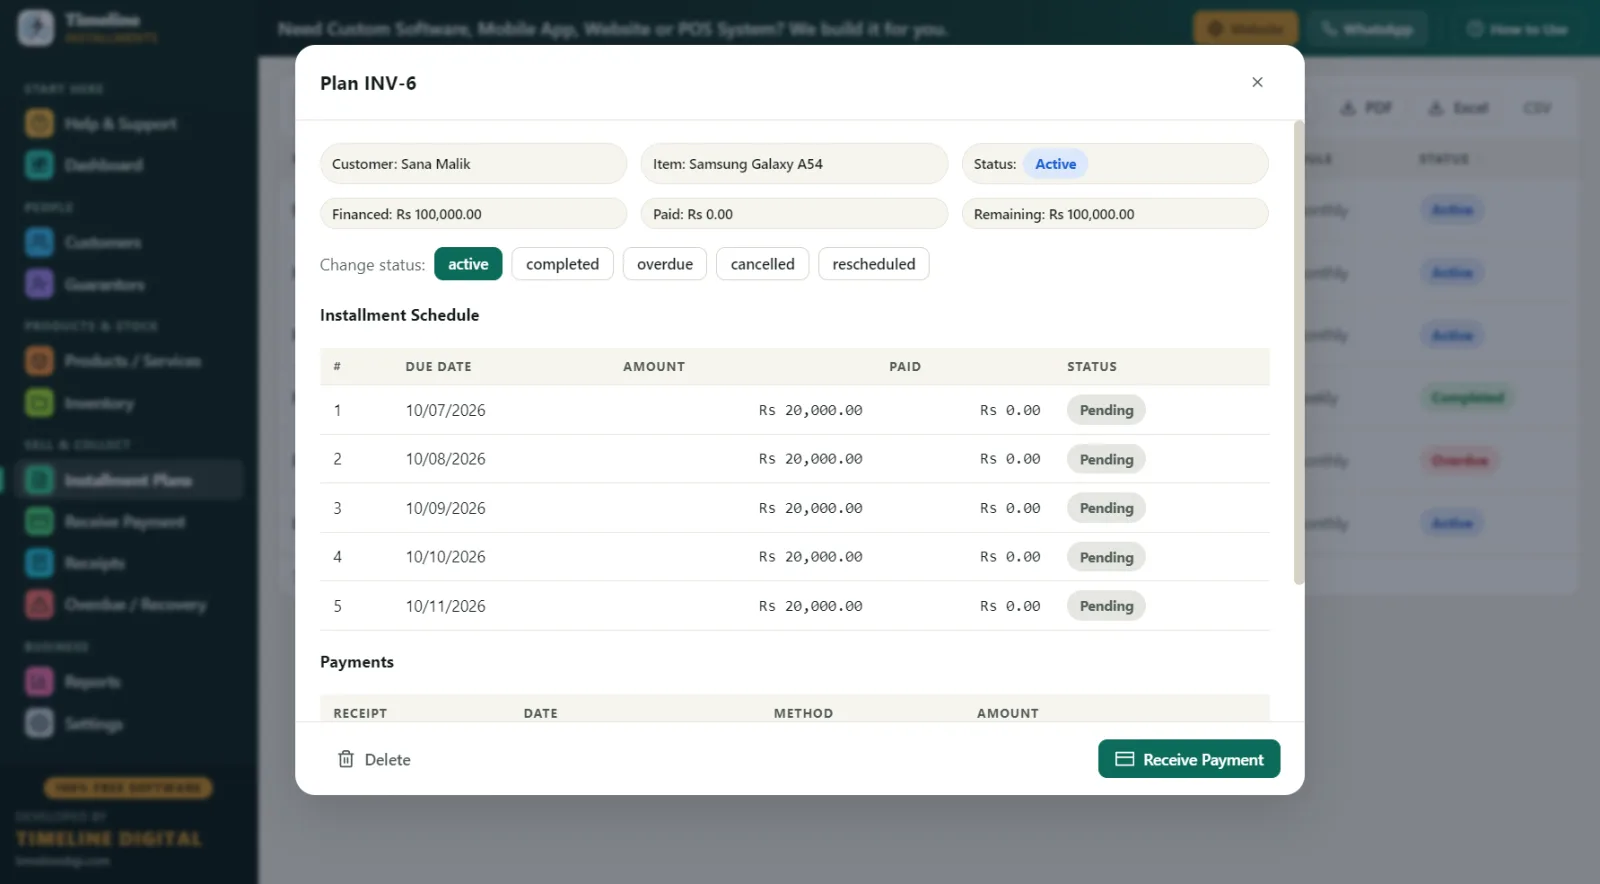
You never manage a plan's status by hand. The app computes it: active while payments are on track, overdue the moment one is late, completed when the last installment clears, plus cancelled and rescheduled when you use those actions. And once real payments exist, the plan's amounts lock — protecting your books from accidental (or not-so-accidental) edits. Any change made is logged in the plan's history.
Step 6 — How do I receive a payment?
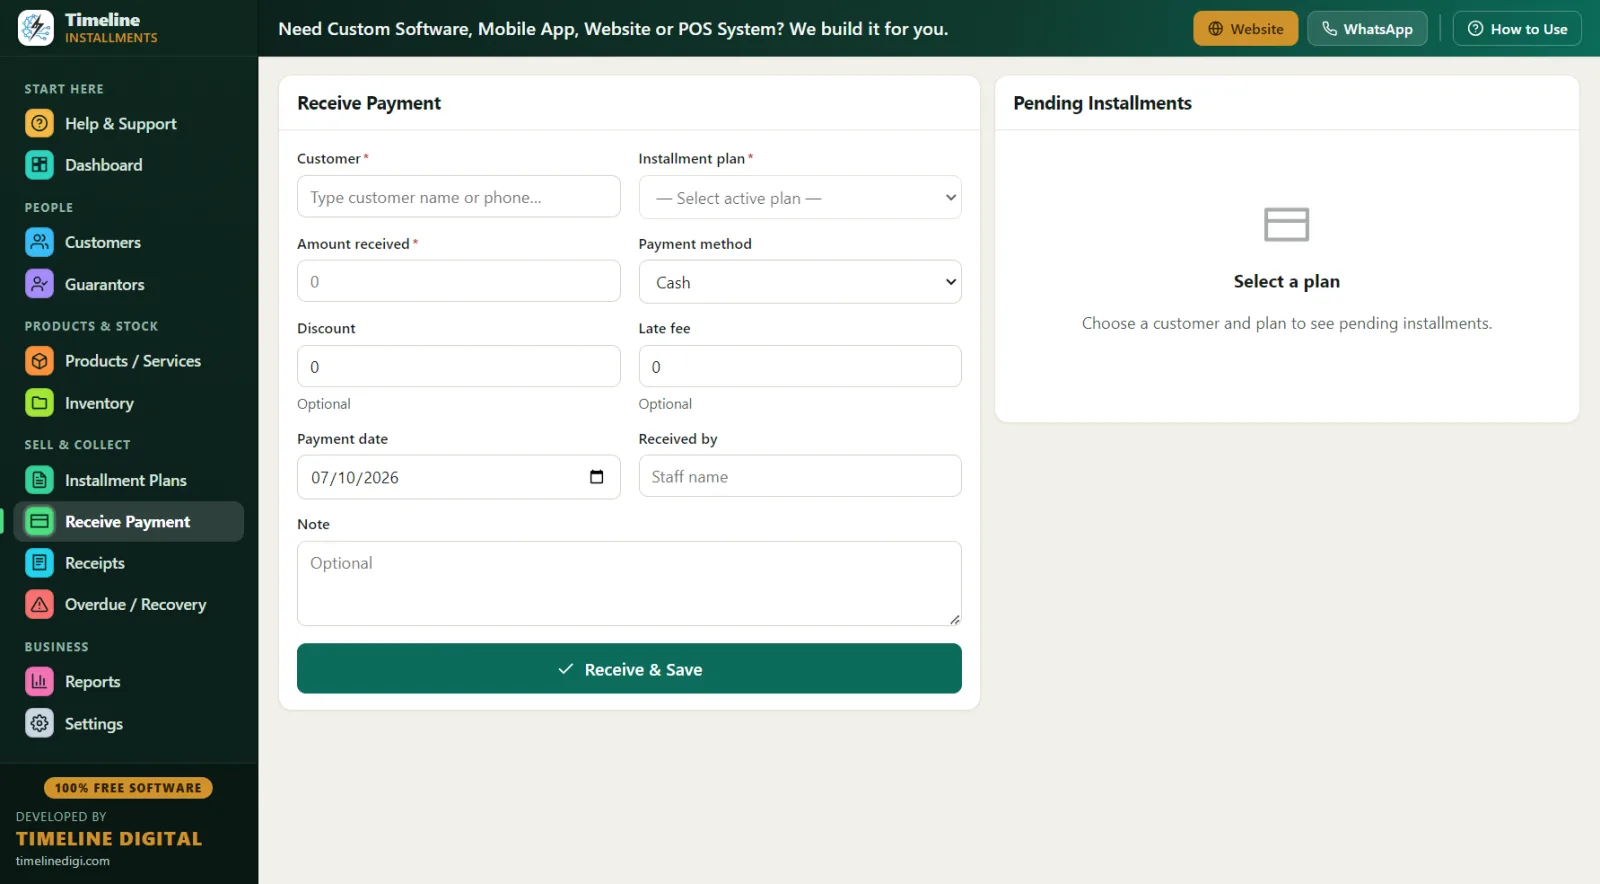
A month later, your customer arrives with Rs 30,000. Go to Receive Payment:
- Search the customer and pick the plan (customers can have more than one).
- The next due amount auto-fills — Rs 30,000 in our example. Change it if needed.
- Choose the method: cash, bank, card, online, or other. Fill received by so you know which staff member took the money.
- Click Receive & Save, then Print Receipt.
Real life is messier than schedules, and the form handles it:
- Partial payments — he only has Rs 20,000 today? Enter 20,000. It's applied to the oldest unpaid installments first, and Rs 10,000 stays pending on this one. No manual math, no confusion next visit.
- Discount — closing out a plan early and knocking Rs 2,000 off? The discount field counts toward settling the balance.
- Late fee — if your policy charges one, enter it here.
Every payment gets its own receipt number — RCP-1, RCP-2, and so on.
Step 7 — How do I print or reprint receipts?
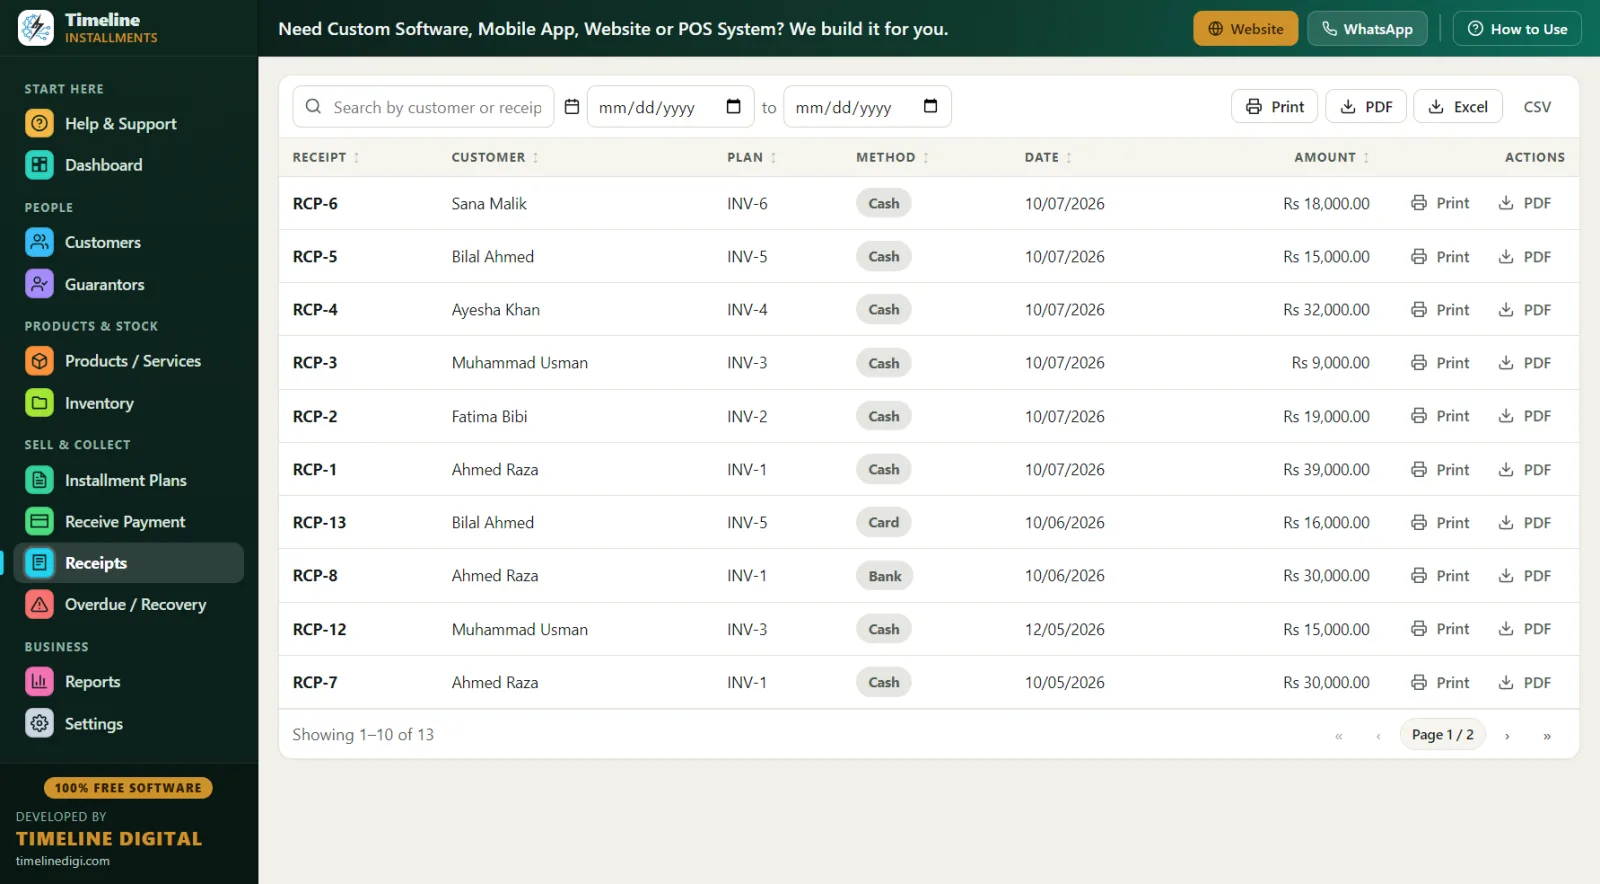
The Receipts page lists every payment ever taken, and any receipt can be reprinted at any time — including the down-payment receipt from months ago that a customer swears he never got.
Receipts print through Windows' native print engine, so any printer you already own works — thermal, inkjet, laser. No printer? Choose "Microsoft Print to PDF" and send the PDF on WhatsApp.
Each receipt is properly branded and complete: your shop logo, name and contact, receipt number, date, customer, plan ref, item, payment method, the amount in large print, "Installments Paid X of Y" (e.g., "Installments Paid 2 of 6"), the remaining balance, received by, signature lines for both sides, and an editable terms footer (set your terms once in Settings — "Goods once sold on installment cannot be returned," or whatever your policy says).
That "Paid 2 of 6 — Remaining Rs 120,000" line ends most balance arguments before they start.
Step 8 — How do I chase late payments?
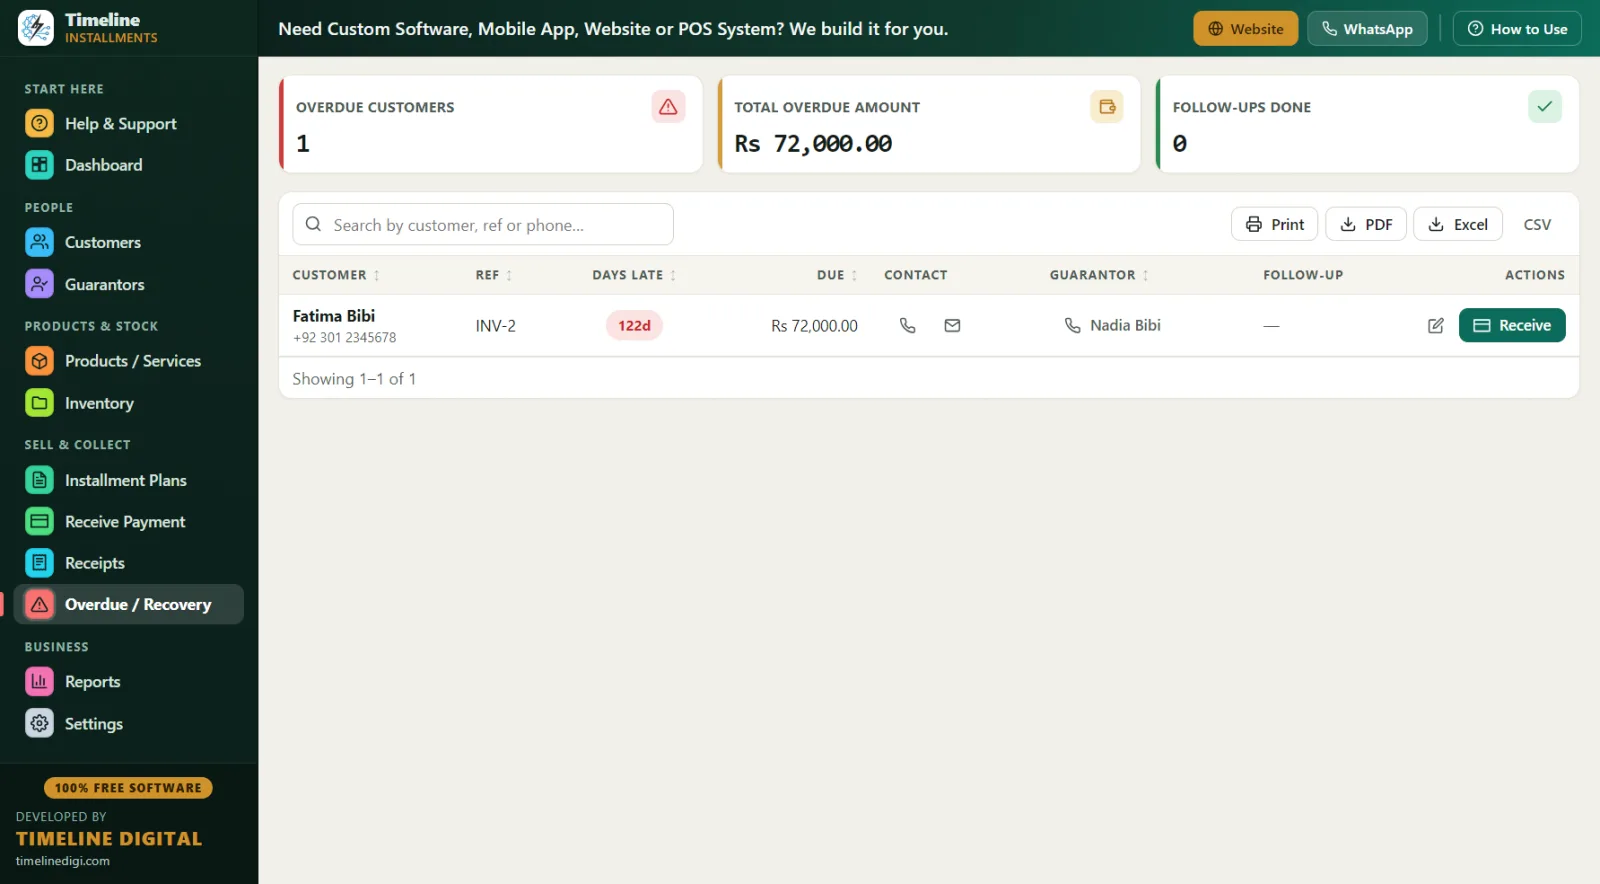
Open Overdue / Recovery each morning. Every late plan is listed with:
- Days late — a customer 3 days late gets a friendly reminder; 30 days late gets a different conversation.
- Amount due and the customer's phone — call without looking anything up.
- Guarantor name and phone — when the buyer stops answering, the guarantor is right there.
- A follow-up note field — "promised to pay Friday" — so next week you remember exactly what was said.
- A Receive button on the row — the moment your call works and he pays, record it without navigating anywhere.
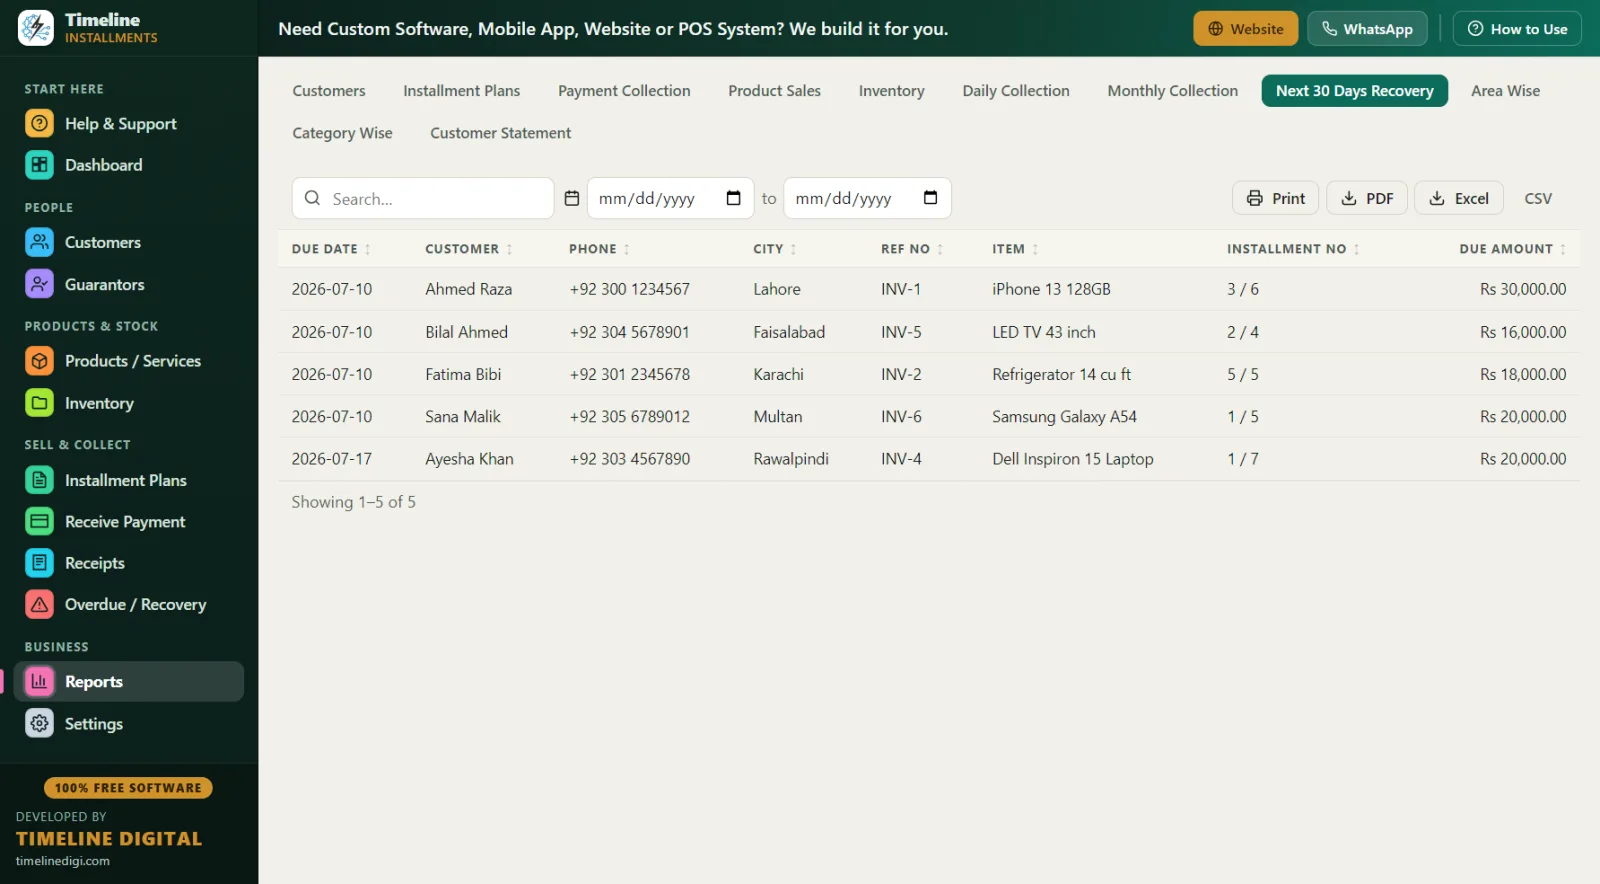
For staying ahead of lateness, open Reports → Next 30 Days Recovery. It lists every installment due in the coming month with due date, customer, phone, city, plan ref, item, installment number, and amount. Print it Monday morning and your collector has a ready visit list — grouped by city, sorted by date. Shops that call customers two days before the due date collect far more smoothly than shops that only call after.
Step 9 — What can the reports tell me?
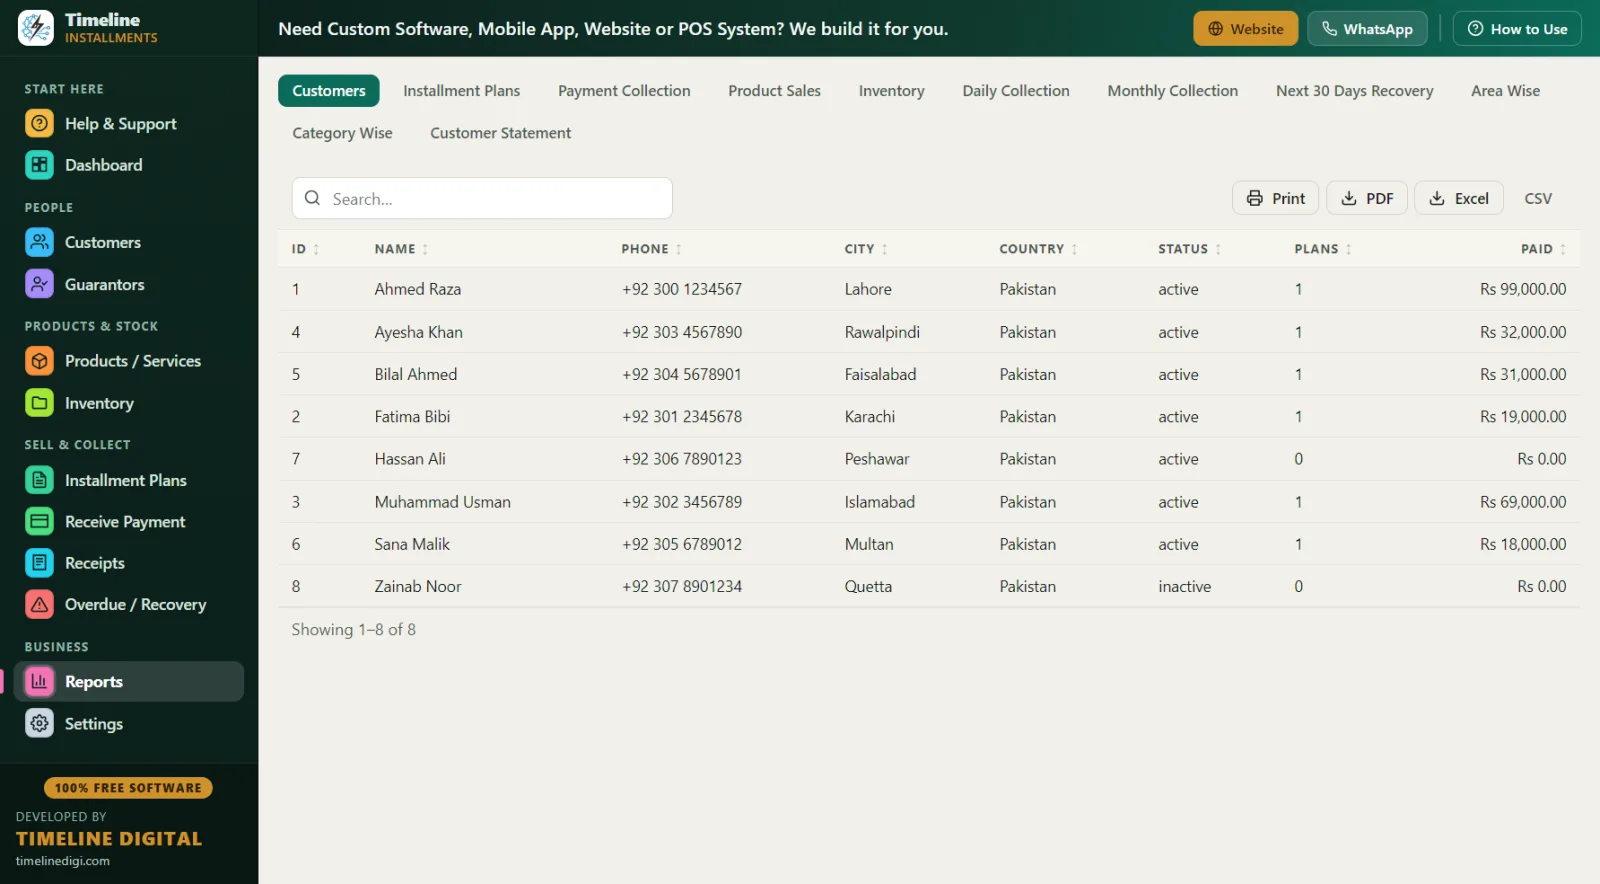
There are 11 reports, and every one is searchable, sortable, and date-filterable, and exports to Print, PDF, Excel, and CSV:
- Customers — full contact list.
- Installment Plans — filter by status: active, overdue, completed.
- Payment Collection — every payment in a period.
- Product Sales — which items actually sell on installments.
- Inventory — stock levels and movements.
- Daily Collection — cash in, day by day. Match it against the drawer each evening.
- Monthly Collection — month-by-month totals; watch the trend.
- Next 30 Days Recovery — your forward collection list (Step 8).
- Area Wise — city by city: customers, active plans, receivable. If Gulberg owes Rs 480,000 and Johar Town owes Rs 150,000, you know where the recovery bike goes first.
- Category Wise — per category: products, plans sold, sales value, receivable. Maybe mobiles bring the volume but furniture carries the receivable risk.
- Customer Statement — one customer's complete picture, per plan: contact, item, total, down payment, financed amount, paid, pending, next due, status. Print this whenever a balance is disputed.
Give your accountant the Excel exports at month-end and stop retyping numbers.
Step 10 — How do I back up (and move to a new PC)?
Your data lives only on your PC — which is great for privacy and means backups are your job. The app makes it a single click:
- Go to Settings → Backup & Restore → Backup Now. A single backup file is created.
- Copy that file to a USB drive (and ideally a second place — another PC or a private cloud folder).
- Set the backup reminder to every 7 days so the app nags you before you forget.
Restoring (new PC, reinstalled Windows, or undoing a mistake): install the app on the target machine, go to Backup & Restore, click Restore, and pick your file. The app makes a safety copy of the current data and asks for confirmation before overwriting anything — so a restore can't silently destroy good records.
While you're in Settings, tour the rest:
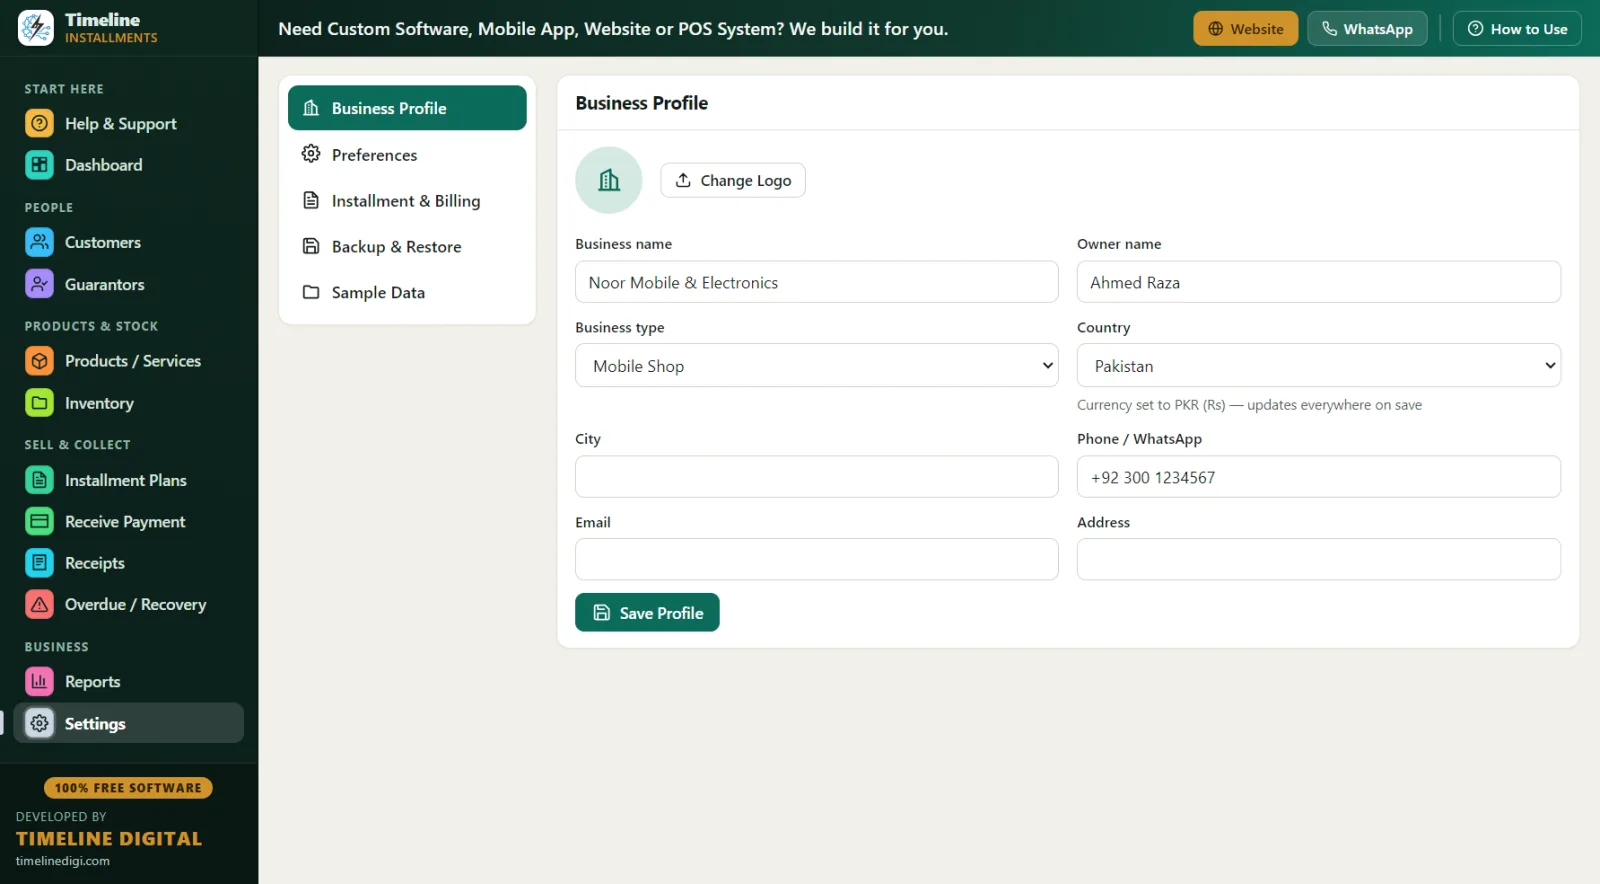
- Business Profile — upload your logo (it appears on every receipt); changing Country cascades the currency app-wide.
- Preferences — currency code/symbol and date format (DD/MM/YYYY, MM/DD/YYYY, YYYY-MM-DD, or DD-MMM-YYYY).
- Installment & Billing — default frequency, default late fee, receipt prefix (RCP), invoice prefix (INV), tax on/off with a rate, and the receipt terms footer.
---
A good daily routine (10 minutes)
| When | Do this |
|---|---|
| Morning | Open Dashboard: check Today's Due and Overdue. Open Overdue/Recovery and make your calls, noting promises in the follow-up field. |
| During the day | Record every payment in Receive Payment the moment cash touches the counter — and hand over the printed receipt. |
| Evening | Run Daily Collection and match it against the cash drawer. |
| Monday | Print Next 30 Days Recovery for the week's reminder calls and visits. |
| Weekly | Settings → Backup Now, copy to USB. |
---
What next?
You now know the full loop: install → set up → products → customers → plans → payments → receipts → recovery → reports → backup. Keep reading:
- Free installment management software — features & download
- How to manage installment payments in a mobile shop
- Best free installment software compared
- Installment recovery tips that actually work
- Country pages: Pakistan (qist/kisti) · India (EMI) · USA (layaway & in-house financing)
Questions? Timeline Digital answers on WhatsApp or through the contact form at timelinedigi.com/contact.